My Warm & Cool Still Life Oil Painting (finished)
12:00 PM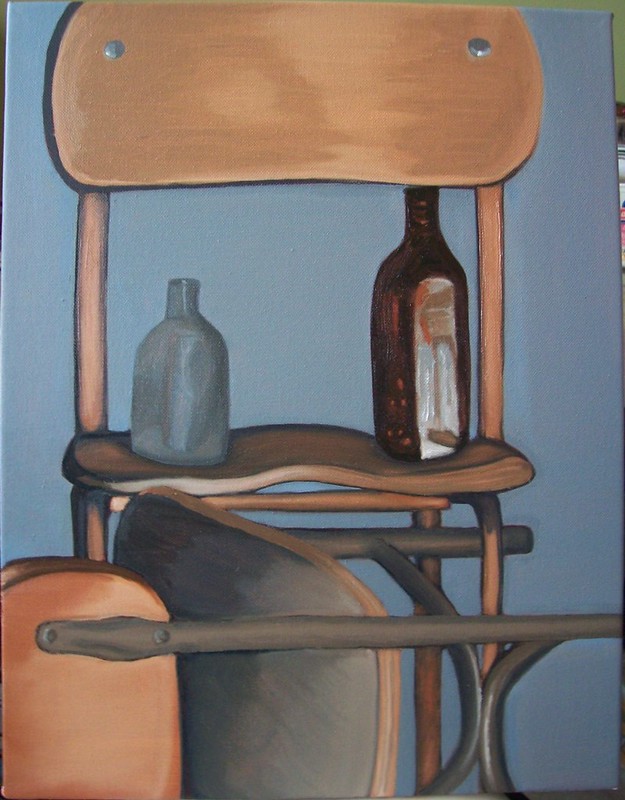
Taaadaaaa!!!! :D lol
Painting the back seat was my fav part, because I really didn't know it was going to look this good!
I honestly just attacked the canvas and really didn't know what I was doing, sort of.
I reallly wanted to give the feel of the scratchiness and the worn out look of the wooden chair, and I think I really achieved it for a beginner! :D
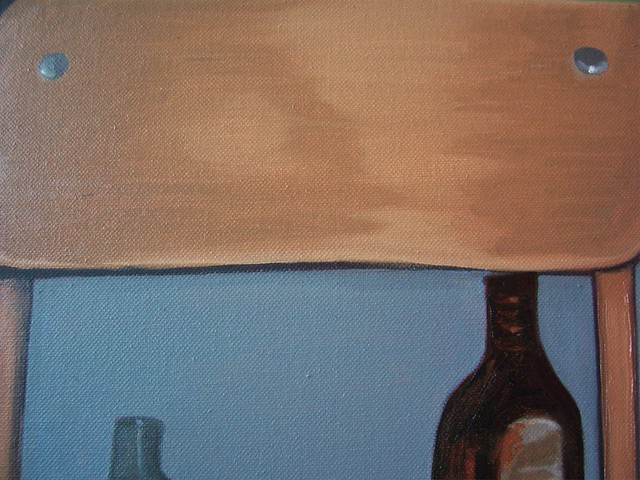
I also wanted the screw to look realistic and ohhhh myyy goddd...I achieved the realistic look of the screws too! :D YAYYYY!!! LOL.
The morning after, my mom, walked into the art room where my painting was, and she saw the screw on my canvas and she was like.....hmmmm....and she thought it was real, that SHE ALMOST TOUCHED IT!!! A painters WORST NIGHTMARE!!! LOL Because, the paint was still very much wet! Phew!
I got a awesome comment from a advanced student and he said, it looks very nice and so real! :D WHOOOOP! *Hannnds in the aiiiir!* LOL :D
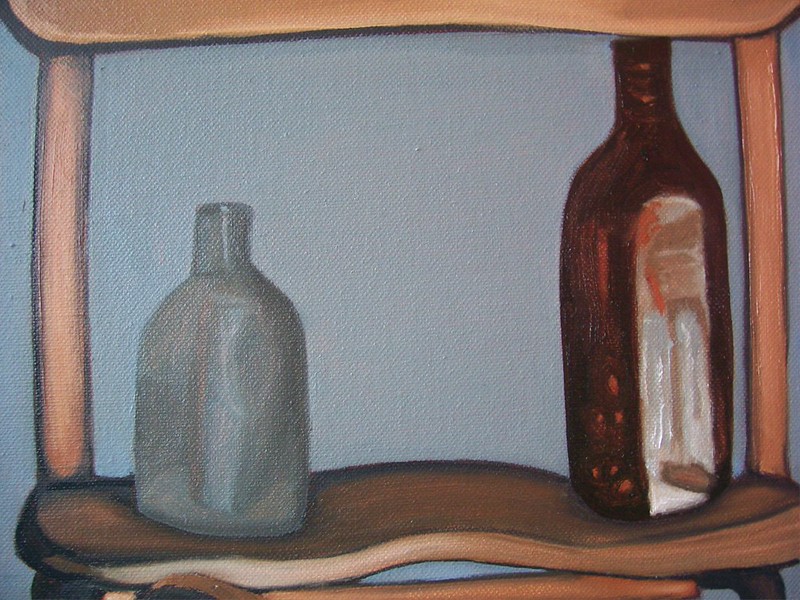
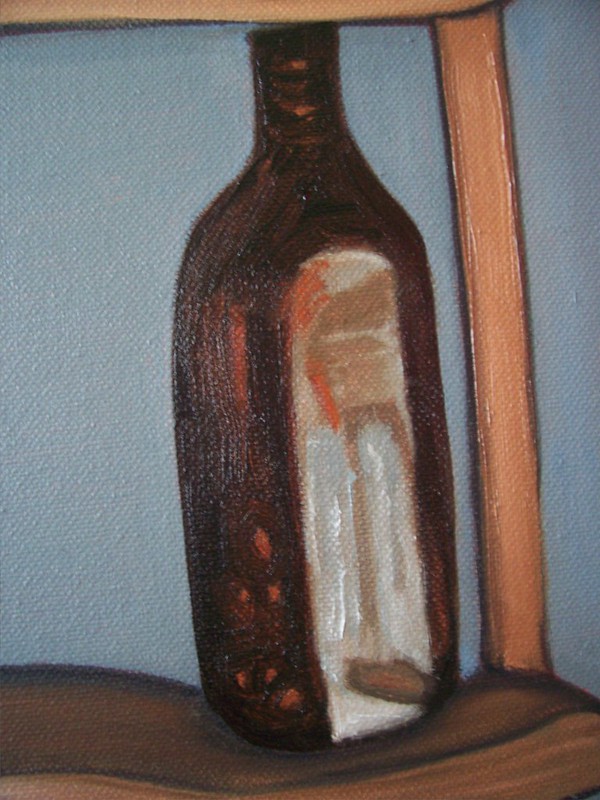
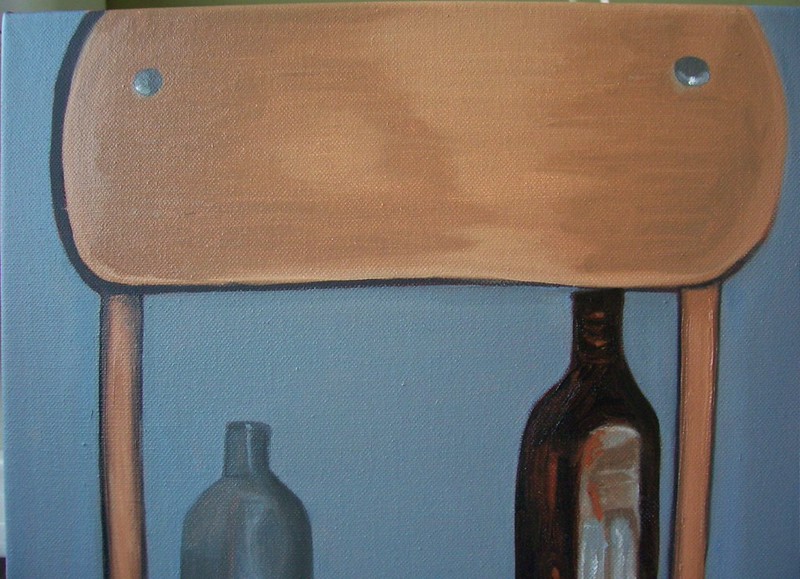
I wanted the bottle, like where the white area and light blue is, I wanted it to be um softer looking and a lil bit transparent, but damn, I could't achieve the look. :/
I was using liquin for this painting, and it makes the paint dry pretty fast, and sooo...the white/light blue area dried and it was hard to blend, I mean, I couldn't really blend, because it felt almost rubbery. ugh, it sucked. :(
I love blending, it's ma thing! But I learned next time, I'm not going to use liquin so much, and just use turpentine, where I can blend more easily, because the paint will dry forever. :)
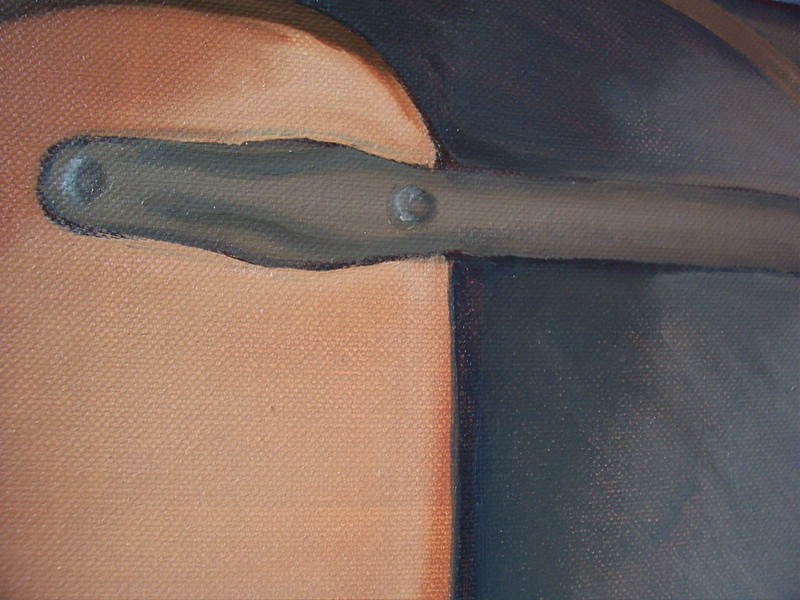
I tried my best to make the metal part of the chair look realistic, like the way I did for the top chair, I wanted the screws to look realistic, but damn, I couldn't do it. :(

A lil explanation of this painting:
My teacher showed us a technique called the 'wipe out' where you first paint the canvas one solid color and then you get your rag or your paint brush and you dip it into turpentine and you wipe out the solid color of what you are going to paint. Like normally you would lightly draw with a pencil, a sketch of what you are going to draw or you would free hand paint, but in this case you just wipe out the paint. When I showed you guys my unfinished work of this painting, most said they loved the colors, well lol...that was the wipe out technique. :) You're actually supposed to wipe out right after you have painted the canvas one whole color, but I was a bad student and I waited the day before my class, lol, which the paint had dried.....sooooo I had to SCRUB THE PAINT OUT! lol. I was sooooo afriad that I would burn or poke a whole in the canvas because I was scrubbing THAT HARD! But I didn't, phew! So that's why some of the paint wasn't wiped away from the canvas, it was dried and almost impossible, so whatever, I did take the most I could take off, I did my best. :P lol
So then the next step was to paint the shadows, and then to just get on with painting everything. :)
I spent 3 days on this painting, and worked really hard to the point that my neck and back was in so much pain, and I got a lil sick and felt ill to my stomach from the fumes, and the last day of doing my painting I got a nose bleed. O.o Boy....the life of an artist.... :P lol. And I don't have a easel, soo I have to put my canvas on a lil stool and stand it up against the art table and I sat across my canvas and that is how I painted for 3 days, not good for my back and neck. -.-.
Oh, and since this is a warm and cool color painting, our color pallet was to only use 3 colors, Burnt Sienna, Ultramarine blue, & Titanium White. :)
I think that is all I have to say about this painting assignment, and that I hope to get another B. :D
♥Eliza


0 comments